Hey there! If you’re reading this, chances are you’ve just gotten a shipment of power fittings from my crew and you’re staring at a pile of connectors, lugs, and terminals wondering, “Wait, how the hell do I put these together without frying something?” Or maybe you’re a new electrician, a DIYer taking on a backyard shed project, or even someone who’s been doing this for years but forgot the fine print that can make or break a setup. Either way, you’re in the right place. I run a small, no-BS power fittings supply company—we’ve been shipping parts to job sites and hobby garages for 8 years now, and I’ve seen way too many folks skip the basics and end up with wonky connections, downtime, or even worse. Let’s walk through this step by step, no fancy jargon, just real tips I’ve picked up from fixing mistakes people made with our fittings. First off, let’s cut through the chaos: installing power fittings isn’t rocket science, but it is about paying attention to the small stuff that a lot of guides skip. I’ve seen a guy use a random screwdriver to crimp a copper lug and have it fall off mid-power-up, and another person over-tighten a terminal so much they split the housing. Don’t be that person. Let’s start with pre-install prep, because 90% of the problems I see start here. You wouldn’t build a house without measuring the wood, right? Same with power fittings. First, double-check what you actually need. We get so many calls a week from people who ordered the wrong size lug for their wire. If your wire is 10 AWG, don’t buy an 8 AWG fitting—too big means the wire slides around, which causes heat buildup and eventually a fire hazard. And for the love of all things electrical, don’t mix copper and aluminum fittings without a anti-oxidation paste. Aluminum reacts with copper over time, creating a corroded, high-resistance connection that will get hot enough to melt insulation. I keep a tube of that paste in my truck for every job, and I swear by it. Next, gather your tools. You don’t need a $500 kit, but cheap tools will mess this up. You need a wire stripper— NOT a utility knife. Utility knives nick the wire strands, which weakens the connection and leads to more heat. A good wire stripper with a gauge selector will make sure you strip exactly the right amount of insulation, not too much (exposed wire touching other parts) or too little (not enough wire in the fitting). Then you need a crimping tool—specifically for the type of fitting you’re using. A coaxial cable crimp won’t work for a copper lug, I don’t care what some guy at a hardware store told you. A good set of crimpers costs like $30, and it’s worth every penny. Finally, you’ll need a torque wrench or a set of wrenches sized for your fittings—over-tightening is just as bad as under-tightening. Okay, time to get hands-on. Let’s break this down by the most common types of power fittings we supply: lugs, terminals, and butt connectors. These are the ones everyone uses, so we’ll focus on those first. Let’s start with lugs—used for connecting a larger wire to a breaker, panel, or motor. Step one: strip the wire. Use that wire stripper, set it to the gauge of your wire, and strip off ¼ inch of insulation. That’s a perfect amount—enough wire to fit inside the lug’s barrel without sticking out too far. Step two: prep the wire. If your wire has loose strands sticking out, twist them together tightly with your fingers (or a pair of pliers if it’s thick). Stray strands will touch other parts of the panel and cause a short, so don’t skip this. Step three: insert the wire into the lug. Make sure it’s all the way in, no exposed copper sticking out the back. If you’re using copper and aluminum together, slather a tiny bit of that anti-oxidation paste on the wire and the inside of the lug first—just a thin layer, you don’t want excess squeezing out when you crimp. Step four: crimp the lug. Put the crimping tool right on the barrel of the lug, not the insulation part of the wire. Most crimpers have color-coded dies—match the color to the gauge of your lug. Squeeze hard until the tool clicks or doesn’t open anymore—don’t baby this, a half-assed crimp will fail. If you’re unsure, test it: tug the wire as hard as you can without yanking, if it moves, you didn’t crimp it enough. Step five: attach the lug to your panel or motor. Line up the hole in the lug with the screw, hand-tighten first, then use your torque wrench to get it to the manufacturer’s specs. Most lugs need between 10 and 30 ft-lbs of torque—check the fitting’s label, don’t guess. Now, if you’re working with terminals—those are the small ones for switches, lights, or smaller wires—process is almost the same, just a little simpler. For insulated terminals (the ones with plastic housing), make sure the insulation of the wire fits all the way into the plastic part of the terminal before you crimp. Don’t crimp right at the end of the barrel, crimp both the wire part and the insulation part if your crimper has two dies—this holds it way tighter. For uninsulated terminals, just stick to crimping the metal barrel, same as lugs. And butt connectors? Those are for joining two wires together, like extending a power cord. Strip both wires ½ inch, twist their strands together, insert into the butt connector, then crimp both ends of the connector firmly. Again, tug test is your friend here. Now, let’s talk about the mistakes I see all the time that people refuse to believe are a big deal. First, skipping the tug test. I’ve had a customer send me a video of a connection that failed mid-job, and when I asked if he tugged it, he goes “Nah, I crimped it, that should be enough.” No, it’s not. Always tug, hard, before you call it done. Second, using the wrong die on the crimp. If your crimper has a yellow die for 12-10 AWG and a red die for 8-6 AWG, don’t use the yellow die on your 8 AWG fitting. That leads to a loose crimp that will heat up. Third, not doing a visual check. After you crimp and tighten, look at the connection. Is there exposed copper anywhere? Is the lug splitting? Is the insulation of your wires pinched? If any of that is true, fix it. Also, for outdoor setups—like a generator connection or a shed power line—use heat-shrink connectors instead of regular plastic ones. Regular plastic breaks down in sun and rain, leading to corrosion. Heat-shrink gives a waterproof seal, and all our heat-shrink fittings come with a built-in glue that melts when you heat it, making it even tighter. I always tell people: when in doubt, go a little overboard. It’s better to spend an extra 10 minutes double-checking than to deal with a replacement order or, worse, a safety issue. Now, once you’ve installed everything, there’s one final step that a lot of people skip: a continuity test. You don’t need a fancy $100 multimeter—we sell cheap ones for $15, and they’re worth every cent. Set it to continuity, touch the two probes to the ends of the wire or connection you just made. If it beeps, the connection is good. If it doesn’t, you’ve got a break somewhere—either the crimp is bad, or a strand nicked during stripping broke off. That quick 30-second test can save you hours of troubleshooting later. If you’re working with higher voltage—like 240V for dryers or ranges—please, for real, turn the power off at the breaker first. I’ve seen too many people get zapped because they were in a hurry. Don’t be that guy. Now, if you’re just starting out and feeling overwhelmed, that’s totally normal. Power fittings are basic, but every job is a little different, and it’s easy to overcomplicate things. We’ve got a bunch of free resources on our site (no need for a link, just reach out) that walk through specific types of fittings for different applications—like generator transfer switches, RV connections, and solar panel setups. We don’t push expensive stuff on people; if you only need 5 lugs for a small project, we’ll ship exactly what you need without upselling you a whole kit you don’t want. If you’re working on a big commercial job and need bulk power fittings, we can customize orders to match your exact specs, no minimums that make you buy 1000 of something you only need 500 of. Just shoot us a message if you have questions about sizing, tools, or best practices—our team has been in this game long enough to give you real advice, not the generic garbage you find on YouTube. At the end of the day, installing power fittings is all about being methodical. Take your time, use the right tools, double-check every step, and don’t skip the small tests. The worst thing you can do is cut corners to save 10 minutes—we’ve fixed so many connections from people who did that, and it always costs way more in the long run. If you’re shopping for reliable power fittings that fit right the first time, no weird sizing or low-quality metal that breaks after a month, we’ve got your back. Whether you’re a contractor needing bulk orders or a DIYer with a one-off project, hit us up to talk through what you need. No pressure, no sales pitch, just straight answers from people who actually use these fittings every day. Power Fittings
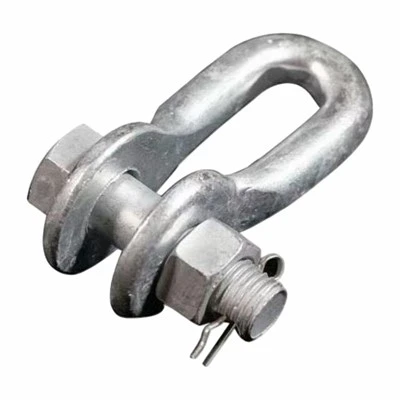
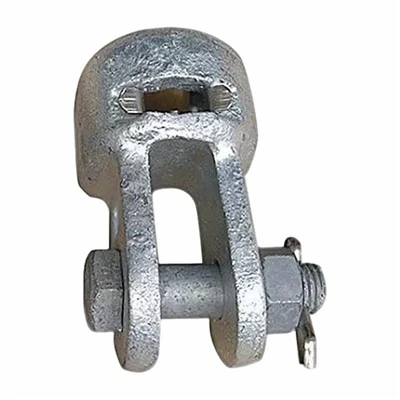
Protective Fittings References:
- National Electrical Code (NEC) Handbook, 2023 Edition
- "Electrical Connection Installation Best Practices", Power Industry Journal, Vol. 18, No. 4, 2022
- Safety Standards for Electrical Power Fittings, OSHA 29 CFR 1910 Subpart S
- Crimping Techniques for Low-Voltage Power Applications, Wire & Cable Technology Association, 2021
Hebei Tongchuang Power Fittings Co., Ltd.
With abundant experience, we are one of the most professional power fittings manufacturers and suppliers in China. Please feel free to buy advanced power fittings for sale here from our factory. Good service and quality products are available.
Address: Houxiaohan Industrial Zone, Xingbieying Town, Hejian City, Hebei Province, P.R. China
E-mail: tongchuangepf@gmail.com
WebSite: https://www.tongchuangpower.com/
