Hey there! I’m a supplier of welded wire mesh, and I’ve been in this business for quite a while. One question I get asked a lot is how to install welded wire mesh on exterior walls. Well, you’re in luck! In this blog, I’m gonna share with you all the steps and tips I’ve picked up over the years. Welded Wire Mesh
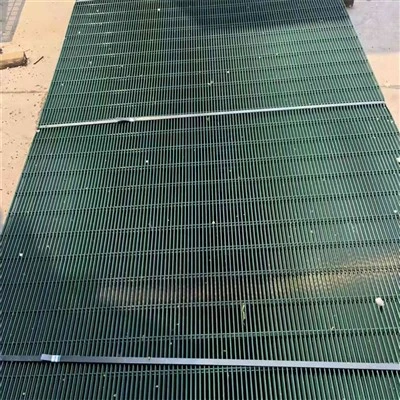
Why Use Welded Wire Mesh on Exterior Walls?
Before we dive into the installation process, let’s talk a bit about why you’d want to use welded wire mesh on your exterior walls. First off, it provides excellent reinforcement. Whether you’re dealing with stucco, plaster, or some other type of exterior finish, the wire mesh helps to prevent cracking and provides added strength.
Secondly, it helps with the adhesion of the finish material. The mesh creates a rough surface for the stucco or plaster to grab onto, ensuring a more durable and long – lasting bond. And let’s not forget about its anti – corrosion properties. Most of the welded wire mesh we supply is galvanized or coated, which means it can withstand the elements without rusting.
Getting Ready for Installation
The first thing you need to do is make sure you have all the necessary tools and materials. You’ll need the welded wire mesh itself, of course. We’ve got a variety of sizes and specifications to meet your needs. Depending on the wall’s condition and the type of finish you’re applying, you might choose different mesh sizes. For example, a finer mesh is great for a smooth finish, while a coarser one can provide more reinforcement for a thicker application.
Other tools include a staple gun or a powder – actuated fastener, depending on the type of wall. If it’s a wood frame wall, a staple gun will do the job just fine. For concrete or masonry walls, you’ll need a powder – actuated fastener. A utility knife is also essential for cutting the mesh to size. And don’t forget safety gear like gloves and safety glasses.
Measuring and Cutting the Mesh
Once you’ve got everything ready, it’s time to measure the wall. Start by measuring the height and width of the area where you’ll be installing the mesh. Add a few extra inches to each measurement to ensure you have enough overlap.
Now, take your utility knife and scissors and cut the welded wire mesh to the appropriate size. It’s pretty straightforward, but be careful when handling the cut edges because they can be sharp. Make sure to cut along the wires for a clean and even cut.
Attaching the Mesh to the Wall
Let’s start with the attachment process. If you’re working on a wood frame wall, use your staple gun to secure the mesh. Begin at the top corner of the wall and work your way down. Place the staples about 6 to 8 inches apart, making sure the mesh is tight against the wall. You don’t want any loose areas because that can cause problems with the finish later on.
For concrete or masonry walls, use the powder – actuated fastener. Drill holes at regular intervals, usually about 6 to 8 inches apart, and then insert the fasteners through the mesh and into the wall. Make sure the fasteners are secure and hold the mesh firmly in place.
As you work your way around the wall, overlap the mesh sections by about 2 inches. This overlap helps to create a continuous reinforcement layer and ensures a strong bond between the mesh pieces.
Dealing with Corners and Edges
Corners and edges can be a bit tricky, but with a little practice, you’ll get the hang of it. At the corners, cut the mesh at a 45 – degree angle and overlap the pieces. This creates a smooth transition around the corner and prevents any unsightly gaps.
For window and door openings, cut the mesh to fit tightly around the edges. You can use a staple gun or fasteners to secure the mesh around these areas, just like you did with the rest of the wall. Make sure the mesh is flush against the edges to prevent any water from seeping in.
Final Checks and Preparing for the Finish
Once you’ve attached the mesh to the entire wall, give it a final check. Look for any loose areas or sharp edges that need to be trimmed. Make sure the mesh is tightly fastened and there are no wrinkles or sagging spots.
At this point, the wall is ready for the exterior finish. Whether it’s stucco, plaster, or some other material, the welded wire mesh will provide the reinforcement and adhesion needed for a great – looking and long – lasting finish.
Tips and Tricks
Here are some extra tips I’ve learned over the years. When you’re cutting the mesh, try to cut it in a well – ventilated area because the dust from the cut wires can be a bit annoying. Also, if you’re working on a large wall, it’s a good idea to have a helper. They can hold the mesh in place while you attach it, making the process much faster and easier.
Another tip is to store the mesh properly. Keep it in a dry place to prevent rusting. And if you have any leftover mesh, don’t throw it away. You can use it for small repair jobs later on.
Conclusion
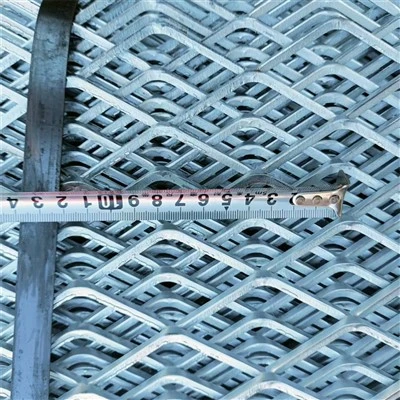
Installing welded wire mesh on exterior walls is not as difficult as it might seem. With the right tools, materials, and a bit of patience, you can do it yourself. The benefits of using welded wire mesh, such as reinforcement, better adhesion, and corrosion resistance, make it a great choice for any exterior wall project.
Wire Mesh Panel If you’re interested in purchasing welded wire mesh for your next project, I’d love to hear from you. We’ve got a wide range of products to meet your specific needs, and we can offer you competitive prices. Just drop me a message, and we can start a conversation about your requirements.
References
- Construction Materials Handbook: A Guide to Building Materials and Their Applications
- Exterior Wall Finishing Techniques Manual
Anping Binze Wire Mesh Products Co., Ltd.
We are one of the most experienced welded wire mesh manufacturers and suppliers in China, also support customized service. Please feel free to buy high quality welded wire mesh for sale here from our factory. For price consultation, contact us.
Address: Taicheng Industrial Zone, Anping County, Hengshui City, Hebei Province
E-mail: binzemesh@outlook.com
WebSite: https://www.binze-mesh.com/
